
DIY Mobile Home Remodel on a Budget (Part Two)
This is part two in a series of our personal double wide mobile home remodel. See what improvements we’ve made so far to our 20-year-old mobile home.

Whew – it has been BUSY around here!
However…I’m glad to say that we are finally making some progress. We have finished some of the big projects that really make a huge difference in a mobile home renovation.
So, let’s take a look at the big changes we’ve made during our mobile home remodeling!
Here is part one of our Mobile Home Renovation Project with more before photos if you want to check it out!
Mobile Home Makeover
So far, we’ve redone the walls, ceiling, lighting, flooring, and some simple DIY projects. Even without update cabinets, the home already has an all new feel to it!
The Ceiling and Walls
When we decided to purchase this older mobile home, we knew the first things to tackle were the ceilings and the interior walls. They just had the look of a mobile home – and I knew I didn’t want that long term. You probably know what I’m talking about…
The walls had little strips in between the panels and heavy popcorn ceilings. The corners had the skinny trim pieces instead of finished edges.
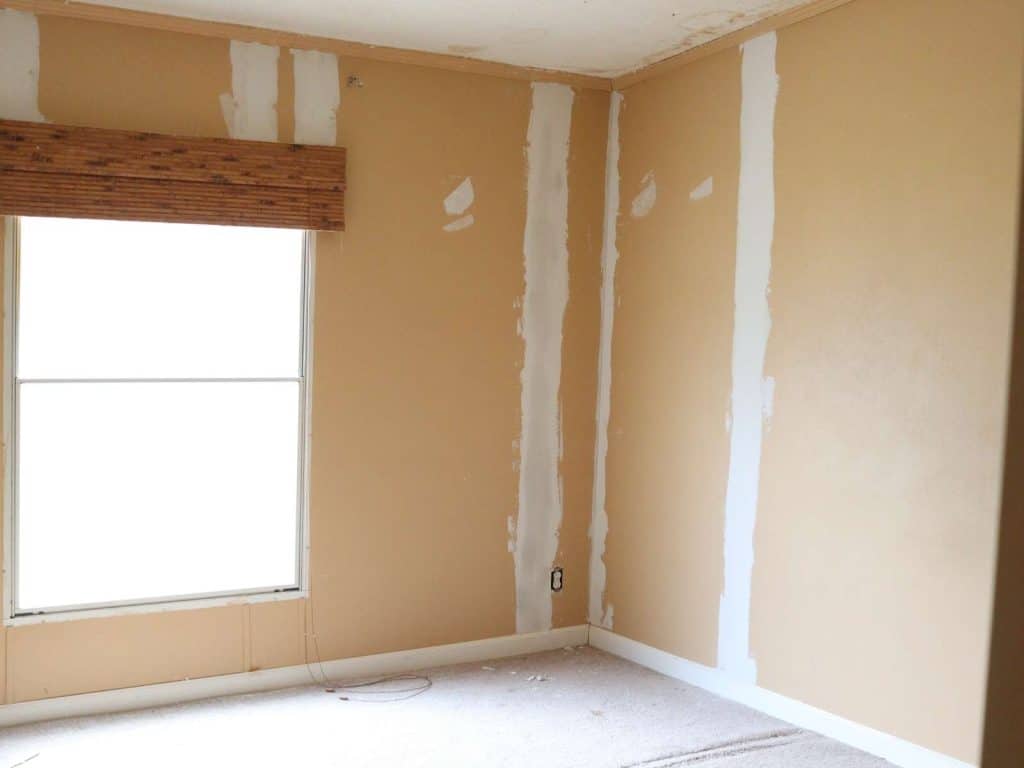
The paint colors were also really dark and dingy. And there were a couple of areas that had water damage from a hurricane that needed to be cut out and replaced. Even though we are working with a pretty tight budget, we knew we needed help with the sheetrock work.
So, we hired someone to come in and scrape the ceilings, pull all of the strips off of the walls, and retexture everything. After that was done, we applied a new coat of paint to the ceiling and walls using a paint sprayer.
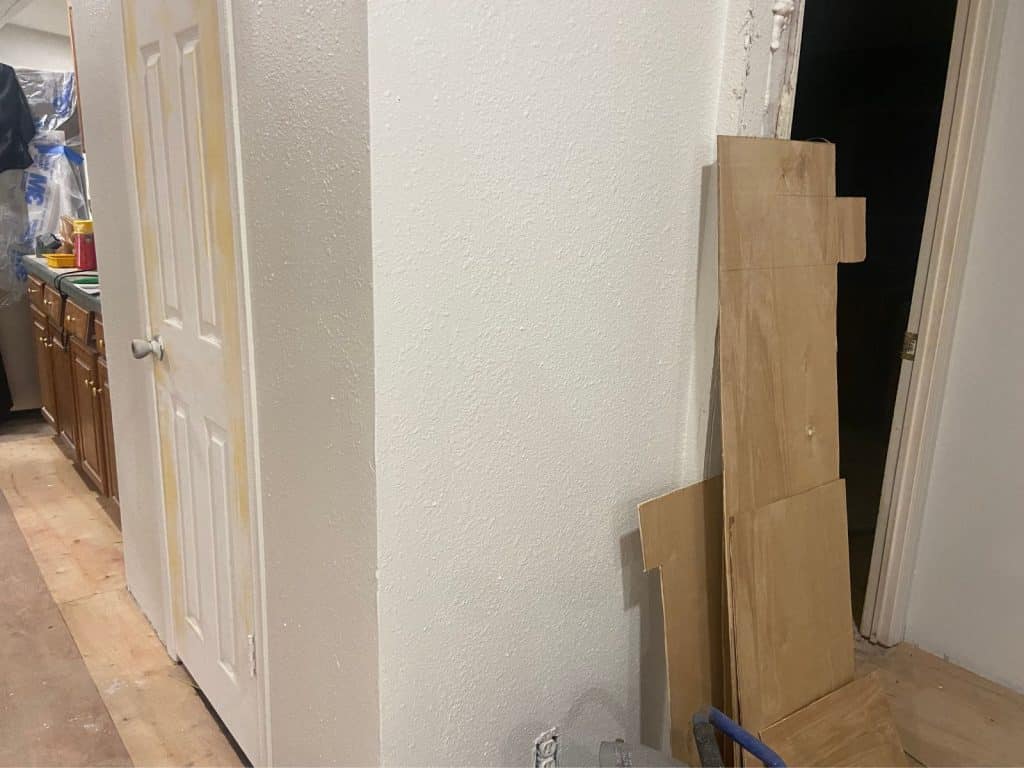
I was shocked at what a difference just the new paint colors made! The light colors really opened up the space. If you have the typical mobile home walls with the strips, I highly recommend having the strips removed and refinished. It will really transform the appearance of your mobile home.
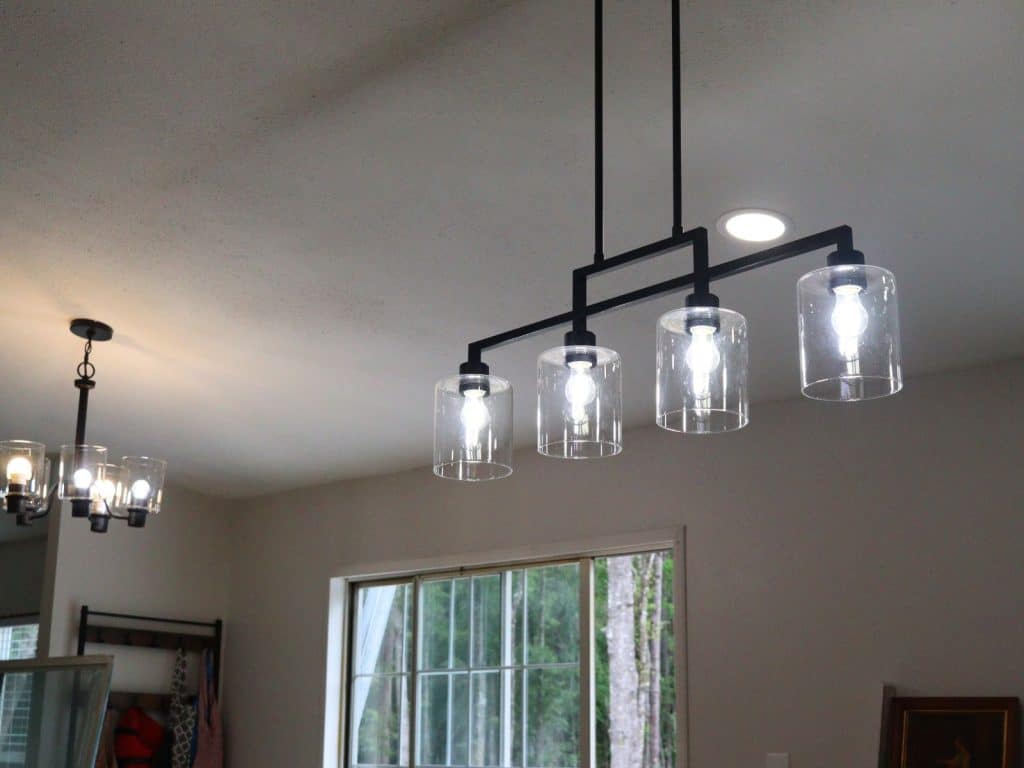
Updating Light Fixtures
The next home improvement project was to the interior lighting. Every room in this whole house only had one light fixture – and it was dark!
So, we hired someone to come install flush mount can lights in entire home. We added lights to the living space, kitchen area, laundry room, and bathrooms. We also added one to the hallways which previously had no fixtures at all! See how much brighter it is?
This was another one of those projects that we didn’t feel comfortable tackling ourselves. But thankfully we have a friend who did the work for us for a really reasonable price. Then, we purchased new black ceiling fans for the master bedroom and living areas.
The kitchen light fixtures also got an update. I purchased these black and glass chandelier fixtures and our new kitchen sink pendant light off of Amazon.
When it came to the bathroom vanity lights, I actually opted to tackle an easy DIY project. I removed and spray painted the vanity lights black to give them a “modern farmhouse” look. I was really please with the way these turned out and they only cost about $10 to redo!
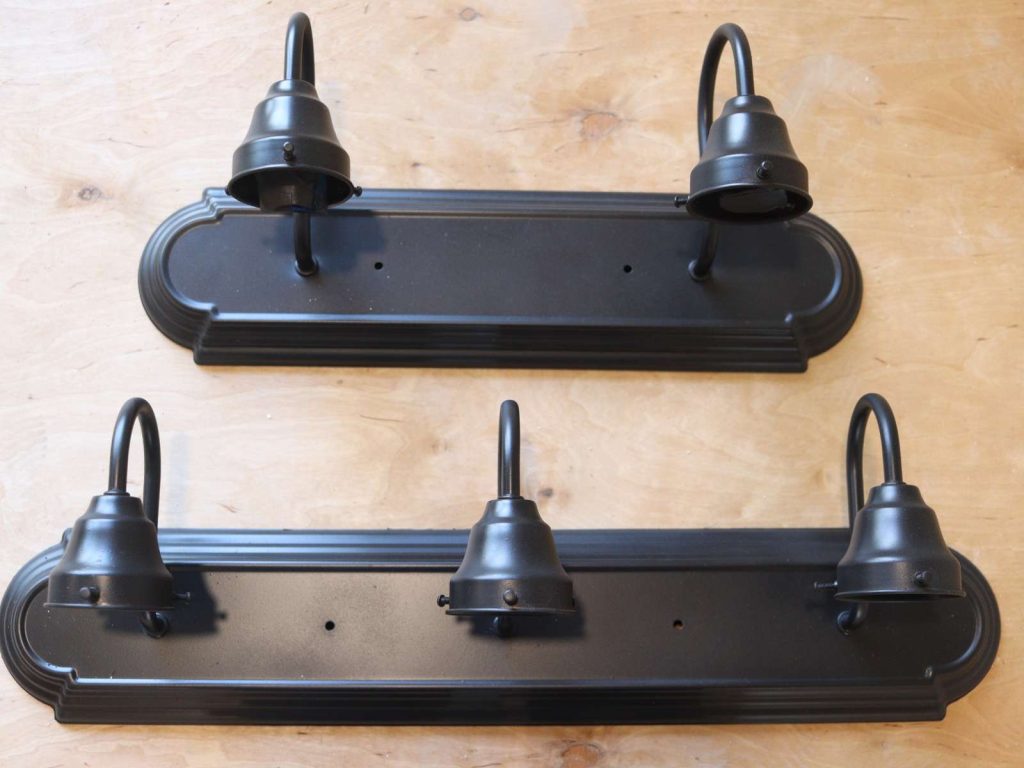
Check out the full post on how to Spray Paint Light Fixtures here!
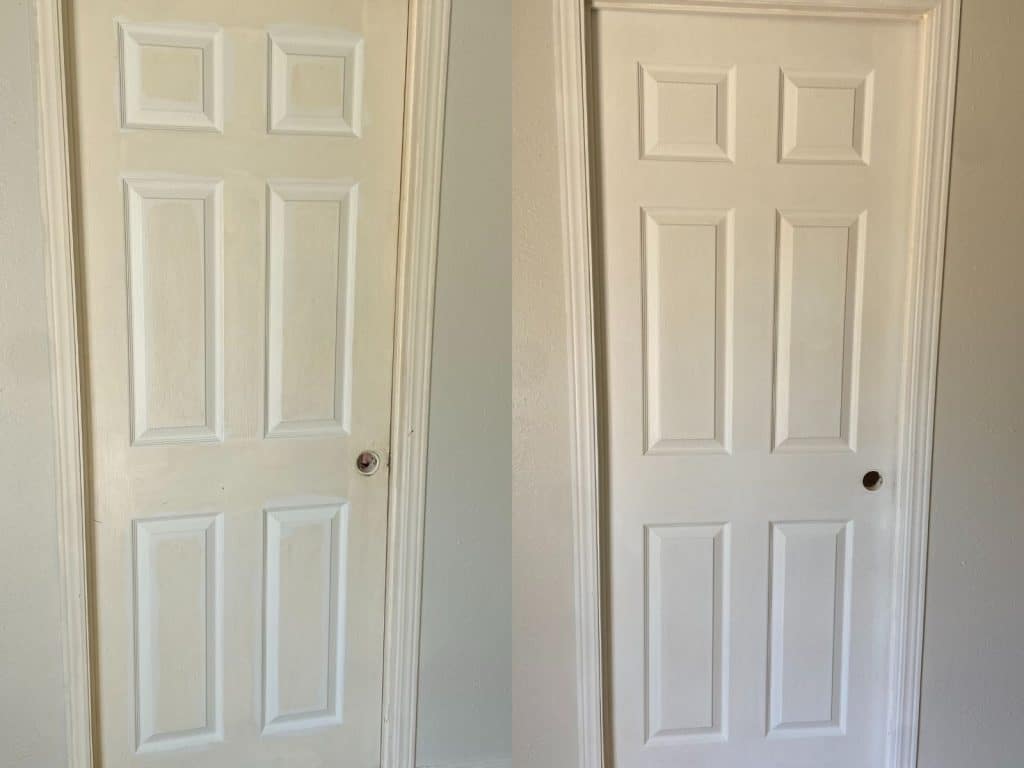
Painting Doors
The interior doors in this house were still in pretty good condition overall. But the paint color was an off white and they just needed some cleaning up.
So, I got to work with some sand paper and paint. This was a great way to save a lot of money by using what we already had. This house has a lot of doors (16 to be exact), so not having to purchase them new was awesome!
We then purchased these new matte black doorknobs that we love from Amazon. You wouldn’t think something as simple as a fresh coat of paint would make a difference, but it was like we had all new doors by the time it was done!
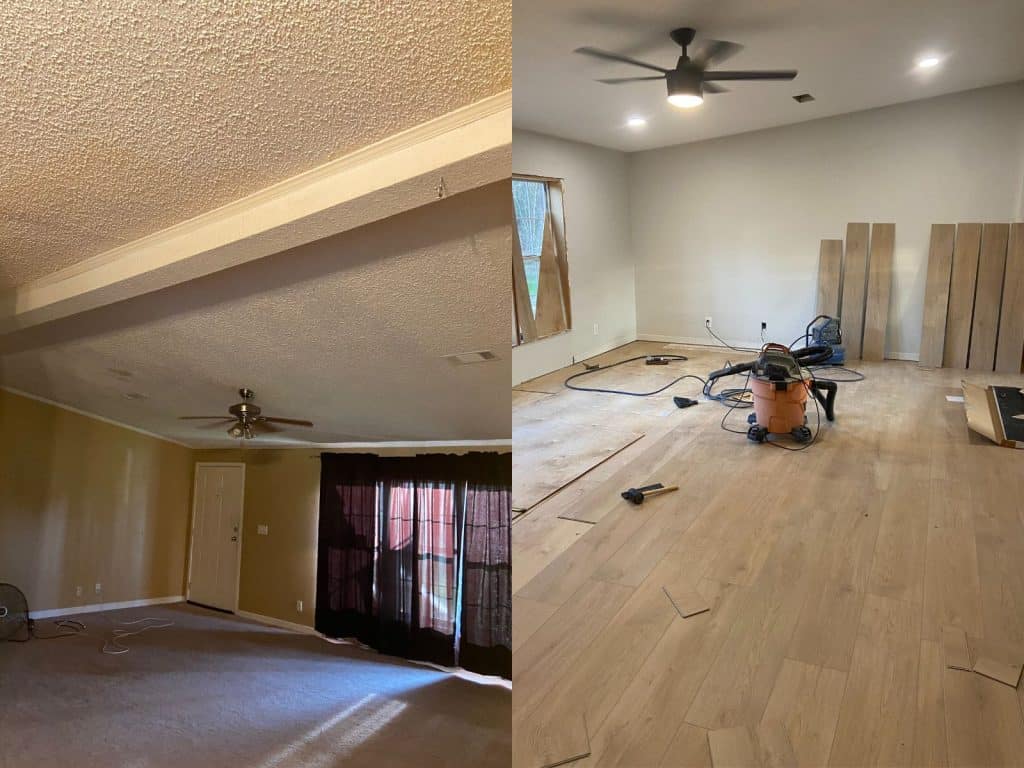
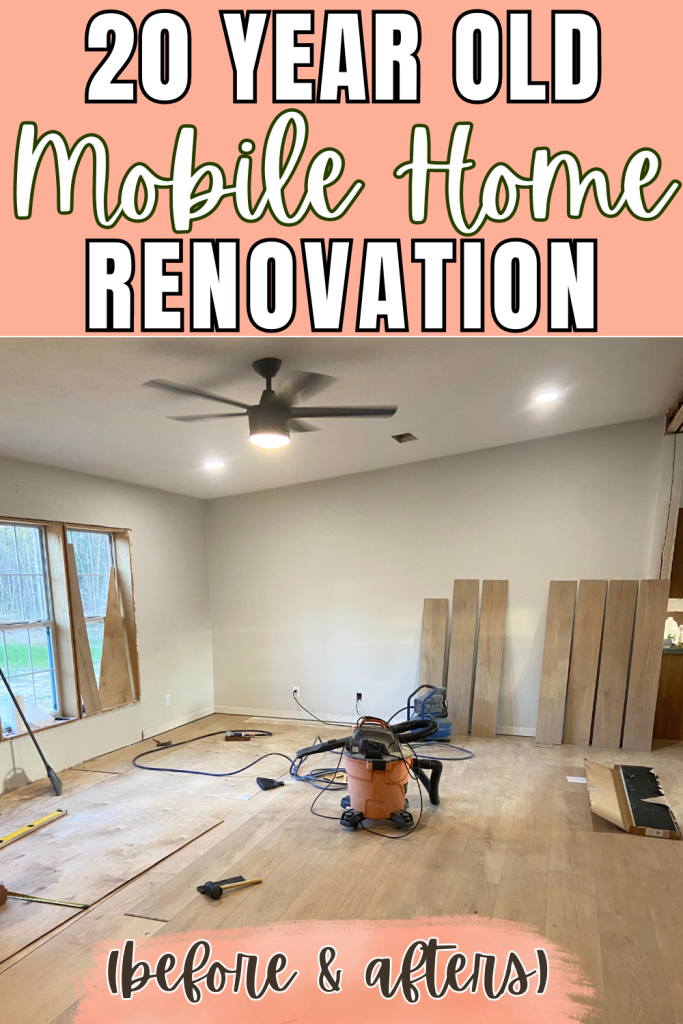
All New Flooring
This was another large purchase that we knew we wanted to take care of right from the beginning. And I am SO glad we did! Just look at the transformation after fresh paint, new lights, and new flooring in our living area..

We knew if we could get these large projects done first, it would give the home a “new home” feel and allow us to move it.
And we could loop back to things like new cabinets and small DIY projects as our finances allow.
(We also opted to only get one bathroom up and running. We will be tackling a full mobile home bathroom remodel soon for the master bath. So be sure to check back for updates on that!)
All of our flooring was purchased from Home Depot.
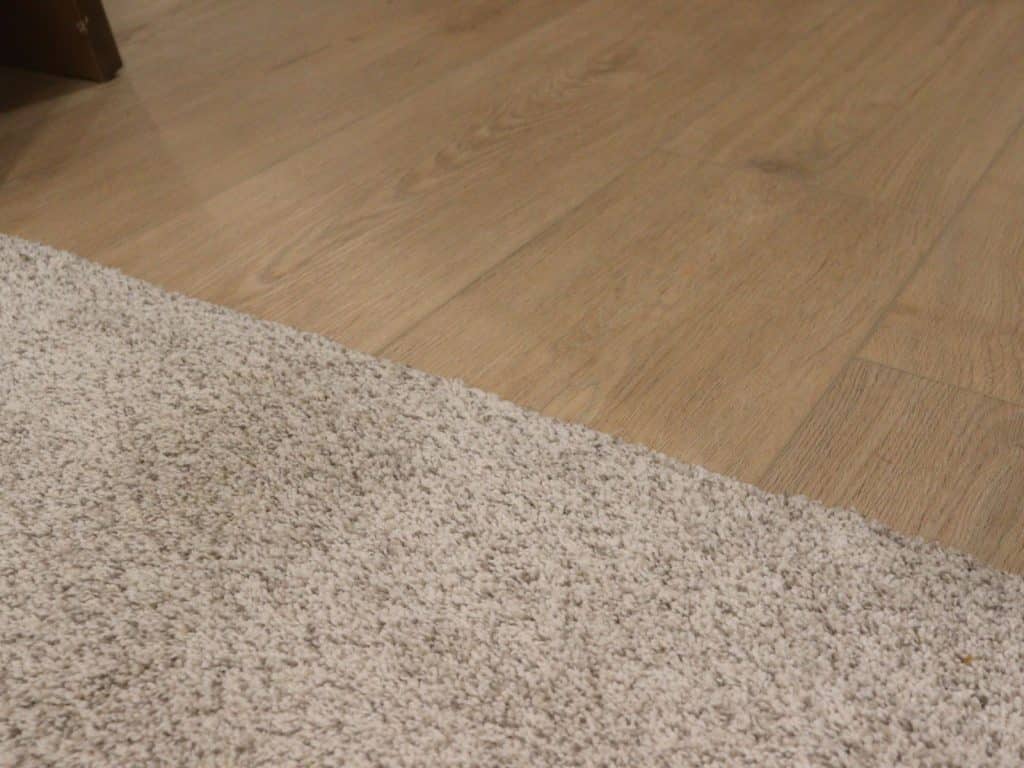
We had new carpet installed by them (the install was free with the purchase of our carpet). Then, we purchased Malibu Wide Plank Luxury Vinyl Flooring in French Oak Lombardo.
My husband installed this flooring on his own. All though it was time consuming, it was fairly simple to lay. And it cut down on additional cost of having to pay for install. We installed carpet in the bedrooms, and LVP in all other rooms.
New Appliances
Since we planned to move in once the flooring and paint was done, we went ahead and purchased our new kitchen appliances. That’s pretty much all we’ve done to the kitchen at this point.
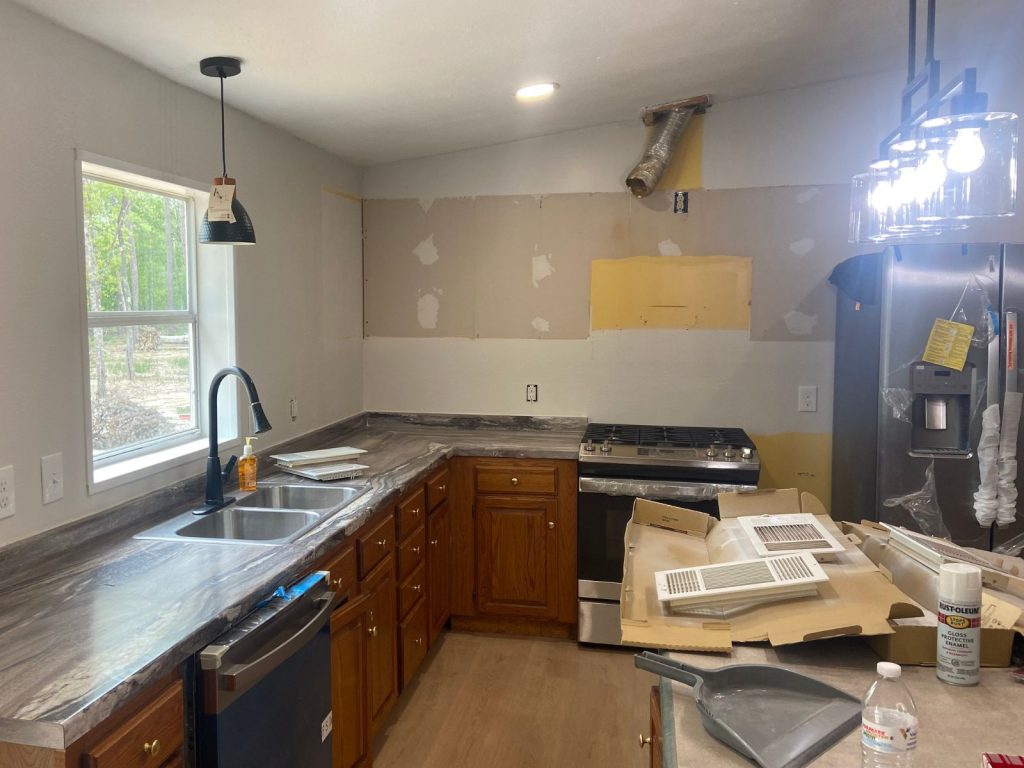
In the near future, we place to remodel the whole kitchen. But for now, we just opted to clean up the existing cabinets and countertops.
I also took the upper cabinets down (some out of preference, others out of necessity to fit appliances). The plan is for upper shelving on the back wall and a new framed vent above the range…but that’s all still to be determined at this point!
We still have a lot of work ahead of us to bring everything up to a more modern style. But overall, I’m very pleased with the progress we’ve made!
How Much a Used Mobile Home Cost to Remodel
You may be looking at all the work we’ve done and wondered why we didn’t just go buy a new mobile home.
The main reason is simple – price. In our area, it is quite common to find older homes that need to be moved for a good price. We purchased this home, as it was, for $20 a square foot.
We knew that we could purchase this used home, (that is still solid) and update it with higher quality finishes for less than a new mobile home would cost us.
Right now, with all the renovations we’ve made PLUS moving costs and utility hookups, we’re at $36 a square foot. Which is still well under the $100 square foot price that new mobile homes are going for in our area. And the best part is – it’s allowing us to stay mortgage free!
Now…we wait to start the mobile home kitchen and bathroom remodel – and then on to the exterior!
Pin This to Check for Updates!
AMAZING WORK!!!
All the same things I’m wanting to do to ours. Just need to get my husband ready also. Keep up the great work!
Deb KH
I’ve remodeled 2 doublewides. I pulled all that tack stick off, and using joint compound and paper tape I filled in the cracks and fixed all the corner cracks. I used a plastic compound scraper to apply joint compound over every square inch of every wall. I created little random ridges that gave the walls a cottage look. Then I painted them a pinkish brownish biege. I used a nail gun to shoot white ceiling trim up, and put trim along the baseboards and around doors. People were amazed at how beautifully it turned out.
Great idea!
I have a thirty year old mobile home I want to renovate. My husband and I are almost 50 years old, we don’t want to start over with a new mortgage BUT mine is not on a foundation, is yours????
No, ours is not on a foundation, just on blocks on a dirt pad.
How do you find someone to re-do the walls and ceiling? What questions do you ask? I’m loving your blog. Thanks for posting.
We were able to find a local sheetrock installer who also paints. We heard of him by word of mouth, he came out to take a look what we needed done and give us a bid.
In addition to what Haley is saying, we found a sheetrock company by looking on Home Advisor & Angi (formerly called Angi’s List) so we could read all the reviews. Not only was I interested in seeing their 5 star reviews, but I also wanted to see how they responded to negative reviews. We will do the same when looking for a brickmason & plumber.
SO EXCITED TO FIND YOU!! I began my adulthood purchasing a 1983 single-wide in a trailer park for $18,000 that I just painted the cabinets, painted the wood paneling, replaced the lights and was able to sell it a few years later for $28,000 after less than a week on the market. In a terrible housing market nonetheless, where other trailers there had been sitting for sale for months! Still patting myself on the back…
My next home was yet AGAIN a mobile home but a big step up; a 9-year-old, 1700sq/ft double wide on 2 acres AND 50% OFF because it was a foreclosure auction!
We’re not on a foundation either. Just tie downs on a gravel crawlspace.
ALL THAT just to talk about WALL BOARD seams! Hahahaha. The first place, it was just in the kitchen and bathroom (wood paneling everywhere else). I took down the strips and filled them myself with the pink stuff that turns white. 2 years later when I sold, it still had not cracked. If I remember correctly (it was like 15+ years ago now!) I think I literally stuffed some crap into the bigger gaps, like newspaper and cardboard, and put the putty right over it.
A bit bigger of a job in this house because some walls are 10ft tall and the WHOLE HOUSE was wallboard. My husband talked me in to leaving the strips and painting over them (I just wanted to MOVE IN!) but I shoulda put my foot down. Years later, we ended up pulling them down and mudding them. If you can’t afford to hire someone, it definitely IS a job you CAN DIY!
There is a guy on YouTube – I want to say The Kilted Painter or something – who goes through the process of how to prep the walls, tape the seams, mud, sand and paint. He definitely does it the RIGHT way so that it will last and not crack.
Personally, I still prefer tiny cracks in a painted wall to those godawful seam strips! Don’t let anything hold you back – just do it and you won’t regret it.
P.S. – we used Behr Paint and Primer in 1 for both houses and it’s been amazing. We did Kilz primer on the wood paneling in the 1983 first though. We didn’t do any sanding or priming on the wallboard and the areas that still have the original paint from move-in (12 years ago, eek!) are holding up well. A few dings in the mudroom/laundry room, but I’m super impressed. And just 1 coat of paint for the most part!
Can you paint over wallpaper and if so what must you do??
Do you have 7 ft or 8 ft walls. Mine is 7 ft and I wish they were at least 8 ft.
We have 7 ft walls as well! Our ceiling is angled though, so at the center of the trailer (at the marriage line) the ceilings are really high. I think this helps make up for the low walls since every room has a high part. The only place I worry about the low ceiling bothering me is the back wall in the kitchen where my sink is. I’m still trying to decide on what cabinet height will look best there.
What paint colors are best in living room kitchen & dinning room…I think I really messed up ,- bought white curtains with orange flowers of all colors .Never before have I did something so crazy help
I used Mist of Grey. Very light grey that’s easy to match to.
Very good remodeling. Haven’t got to there yet but this is exactly what I want to do as well. And when I buy mine, it will be on good sized acreage like their’s.
I read Part 3 – Kitchen 1st, and that was got me to here. I like it.. lots! 😊
It’s looking great and has given me food for thought as I have to move out of this house soon and there’s a VERY cool 1975 double wide for sale nearby. But don’t fall over, the prices here are TEN TIMES what you paid. The one I’m looking at is in a seniors mobile park, water sewer and trash collection is included in $600.00 pad rent, but the sale price is $214,000.00. If I can find land to move it to, I will
What kind of insulation did the existing home have indoor did you replace that with something more substantial?
We did not replace any of the insulation in the home.