Easy Raised Garden Bed on a Budget (How to Build and Fill)
Building and filling a raised bed garden can be expensive if you let it. But there are numerous ways to go about saving money and still have a well set up garden space.
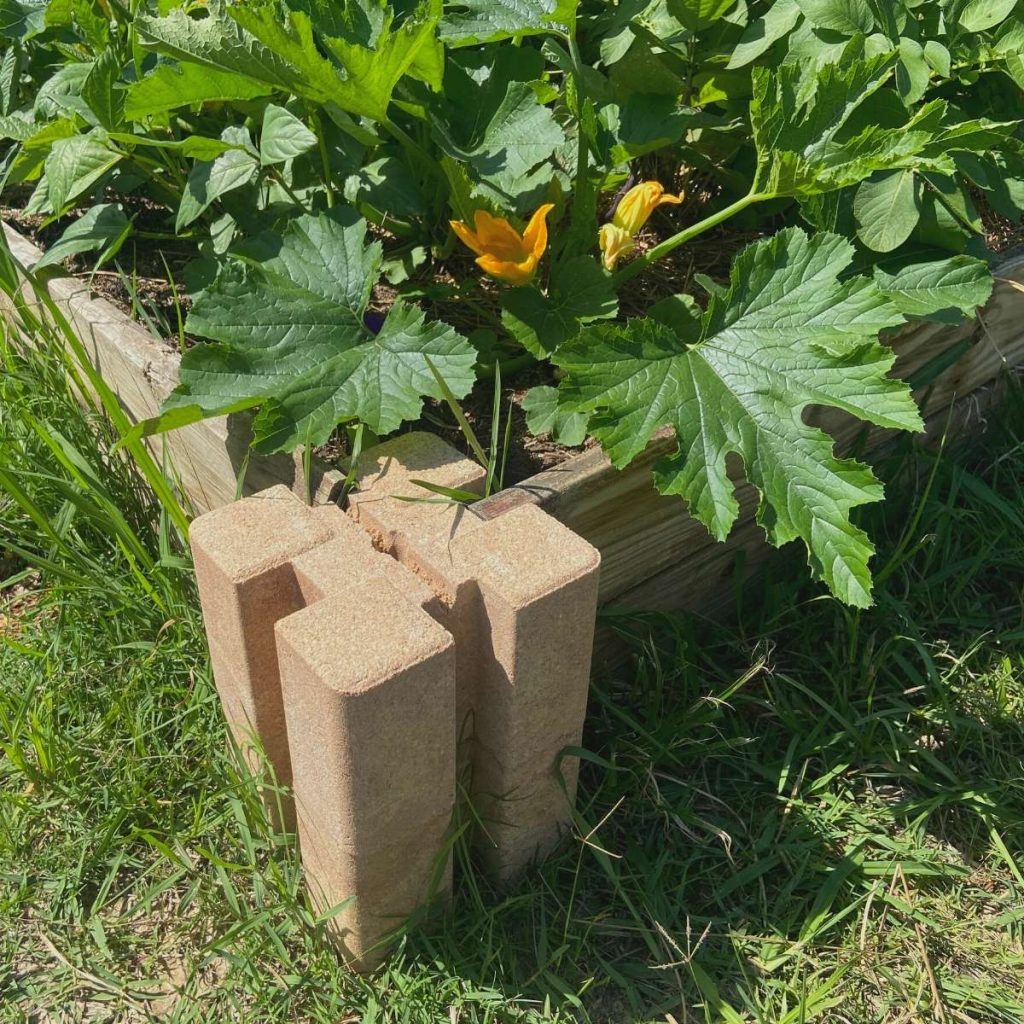
When you start looking at plans for garden bed ideas, you realize that the cost to build and fill your beds can quickly add up. So many designs can make the idea of a having a good garden space on a budget seem impossible. Other DIY raised garden beds are cheap – but only last for a season or so and then need to be replaced.
But then I found a way to make cheap raised garden beds that would actually last year after year. You can build multiple beds in an hour and spend the rest of the day filling them. And if you have access to some recycled materials, you can make these beds even cheaper!
Affiliate disclosure: This post may contain affiliate links. As an Amazon Associate, this means that I will earn a small commission if you choose to purchase through my links. This is at no extra cost to you.
Materials for Cheap Raised Garden Beds
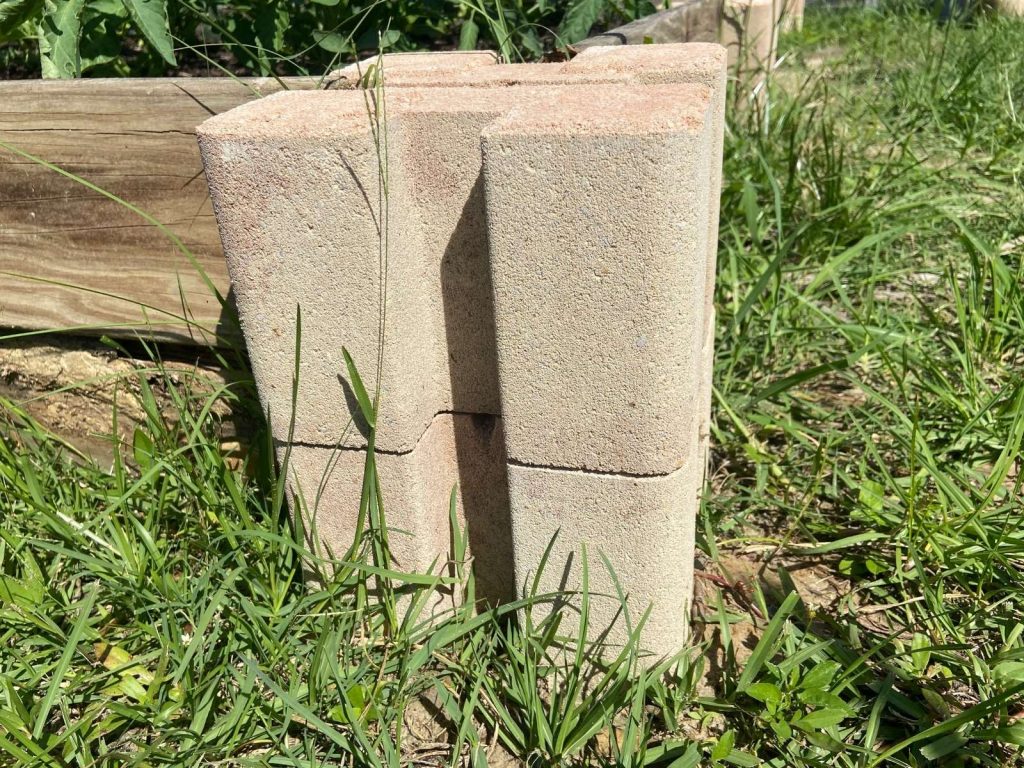
- Oldcastle Planter Wall Cinder Blocks (I found mine at Home Depot)
- Wood – 2X6 inch board will allow for a tight fit in the cinder blocks
The bricks are 6 inches high, so the amount you need will depend on how deep you want your bed to be (jump to size recommendations here).
The boards will need to be cut to the correct lengths for the dimensions of the beds you are building. If you don’t have the tools to cut the boards, see if your local hardware store or garden center that you buy the materials from can cut them for you.
To build a raised garden bed that is 4X8′ by 12 inches deep, you will need:
- 8 Cinder Blocks
- (4) 4-foot long 2X6″ boards
- (4) 8-foot long 2X6″ boards
Assembly of Raised Garden Beds
First, you want to select a location in your yard that gets adequate sunlight and will allow for good drainage. Stay away from areas that remain shaded most of the day or hold excess water in puddles.
If you are setting the bed on top of a non-soil surface (like concrete) it may be best to drill a few small drainage holes around the base of the bed.
Once you have your location, you can “build” the raised beds – which is essentially just stacking your bricks and sliding the wood into the notches.
That’s it. No nails or screws, just the concrete blocks and wood, stacked and connected together.
Now let’s get into some details on measurements, type of wood and the cheapest way to fill these beds.
Size for Raised Beds
There is no one size fits all for raised beds, but there are some general recommendations on what sizes are most appropriate.
Width
In general, you do not want your raised beds to be any more than 4 feet wide. I like this width because it allows for me to reach the center of the bed from either side for planting and pulling weeds. I can space multiple rows through beds of this width as well. If you have a small space and 4 feet is too wide, that’s fine – you can make the beds narrower to fit your space.
Depth
The depth should be a minimum of 12 inches to allow adequate depth for the plant roots to grow. If the roots need to go beyond the 12 inches of topsoil you have provided, they can reach into the ground below. However, if you are planning to set your planter boxes on top of concrete or some other non-dirt surface, 12 inches may not be enough for plants with a deep root system. You will probably want to make your boxes 24 inches deep. These bricks allow for you to stack them up to 4 high, which equals 24 inches.
Length
The length of your planter boxes is up to you. Depending on your garden space, you may only have space for one really long bed. Or you may need to run several shorter beds side by side. Either is fine, as long as you keep the bed width manageable and the depth adequate.
Keep in mind that if you are going to be using more than one board to make up the length of your bed, you will need to add another set of cinder blocks to connect boards.
What kind of wood should I use?
If you google “what type of wood I should use for my raised garden bed” the answer is going to be cedar wood. It is the most suggested type of wood to use in raised beds due to its natural durability and resistance to insects. But it can be expensive, especially if you are planning to build multiple beds at one time.
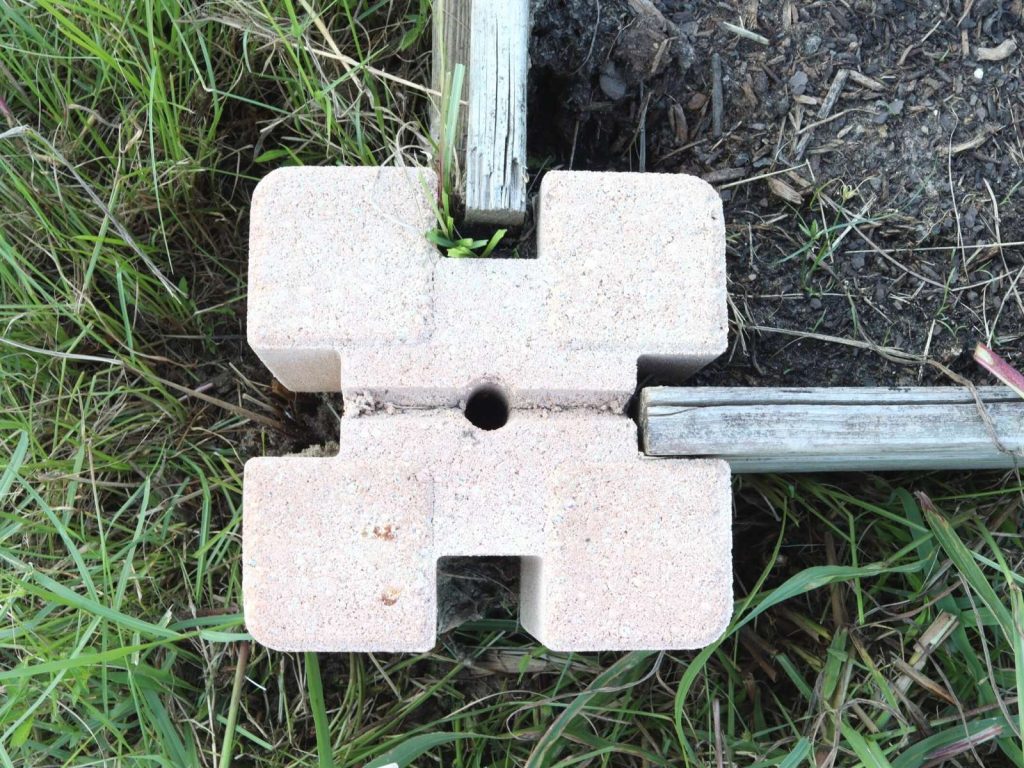
To save money, I opted to use repurposed lumber from an old deck that we had built and were no longer using. These boards are pressure treated 1X6’s. (see notes below on using pressure treated lumber in your beds). The 1-inch thickness is technically too narrow for these corner bricks, but I just stabilized them with another piece of scrap wood. Using this scrap wood was a huge budget saver and allowed me to only spend about $20 per bed!
So, before you head to the local lumber yard, check with friends and family to see if they have any scrap lumber lying around.
If you don’t have scrap wood lying around, pine boards are going to be your most budget friendly option. The important thing to note about untreated pine boards is that they are going to eventually rot. Most gardeners need to replace their pine board raised beds within 5 or 6 years.
How to Fill Your Raised Bed on a Budget
Now that we’ve addressed the building of the beds, let’s talk about filling them!
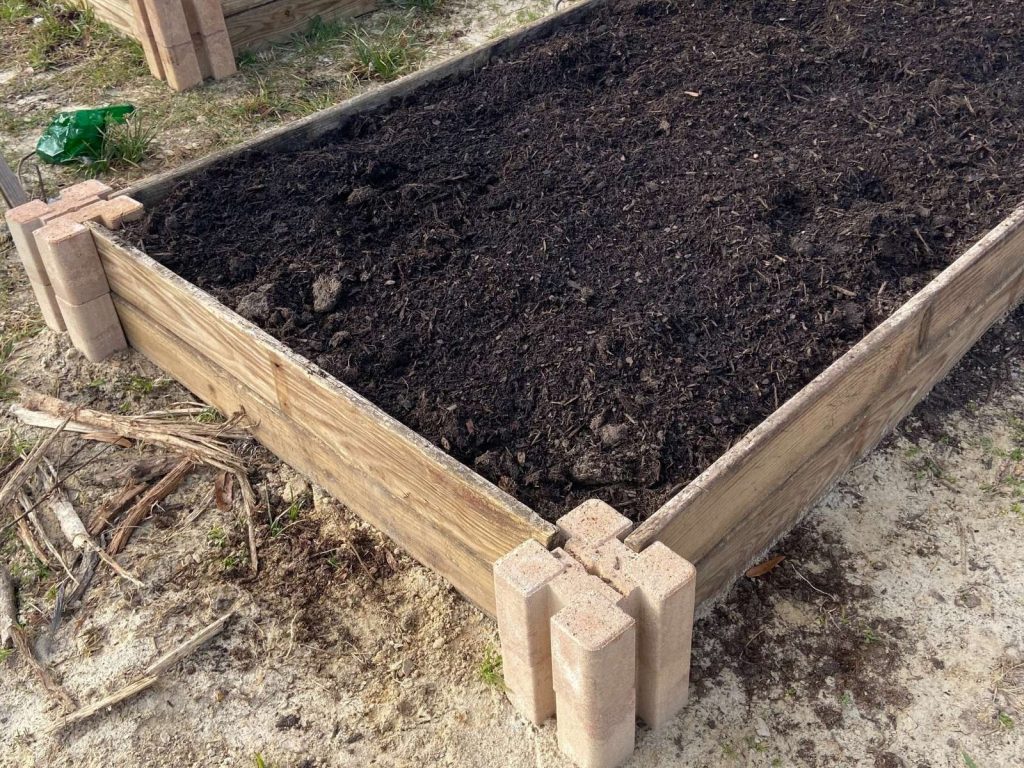
Just like in any garden, good garden soil is critical. The bottom section of your beds can be filled with different materials to help save on soil cost. Using various organic materials that you can probably find around your yard is the best way to cut cost on filling beds. This organic matter will break down over time, adding nutrients back into your soil.
Block the Weeds
The first thing to start with is a weed barrier at the bottom of the bed. Adding a layer of cardboard before you start adding in soil is a cheap way to help limit weeds. Plastic sheeting is another weed barrier that is often used. Obviously, plastic is not organic material and will therefore not breakdown and add nutrients back to your soil.
Start Layering Materials
When filling my own garden beds, I started with a layer of wood mulch that had been sitting in a friend’s yard for a while. On top of that, I added in grass clippings. This took up about 1/3 of the beds depth and helped reduce the amount of soil I needed to purchase.
(Use a free Soil calculator like this to determine how much material you are going to need!)
For the final 8 inches, I used a combination of topsoil and mushroom compost that I purchased in bulk. Every planting season, I mix in another several inches of compost to replenish the nutrients in the soil. Buying soil in bulk will more than likely be cheaper, but you can also purchase bags of soil if bulk isn’t an option.
Speaking of bags of soil – you may be wondering if you need to buy those specialty blends at the garden center that are for raised bed gardens. You can, but you can also just buy topsoil and mix in compost. The compost can be store bought or it can be from your own compost bins.
Check with your local garden centers or gardening friends to see what local materials have worked best for them!
What can I grow in my raised bed vegetable garden?
Pretty much anything! Seriously, there isn’t a whole lot that you can do in an in-ground garden that you can’t do in a raised bed. Tomatoes, cucumbers, peppers, squash, beans, strawberries, potatoes, herbs..the list goes on and on. While anything can grow in a raised bed, it’s important that you consider the size of your bed and the amount of space that a plant takes up.
Start with checking seed packs for the space required. They will tell you if a certain variety is a good container plant. Those do especially well in smaller raised beds. If you have multiple raised beds with a lot of planting space, you’re not limited to just container friendly varieties.
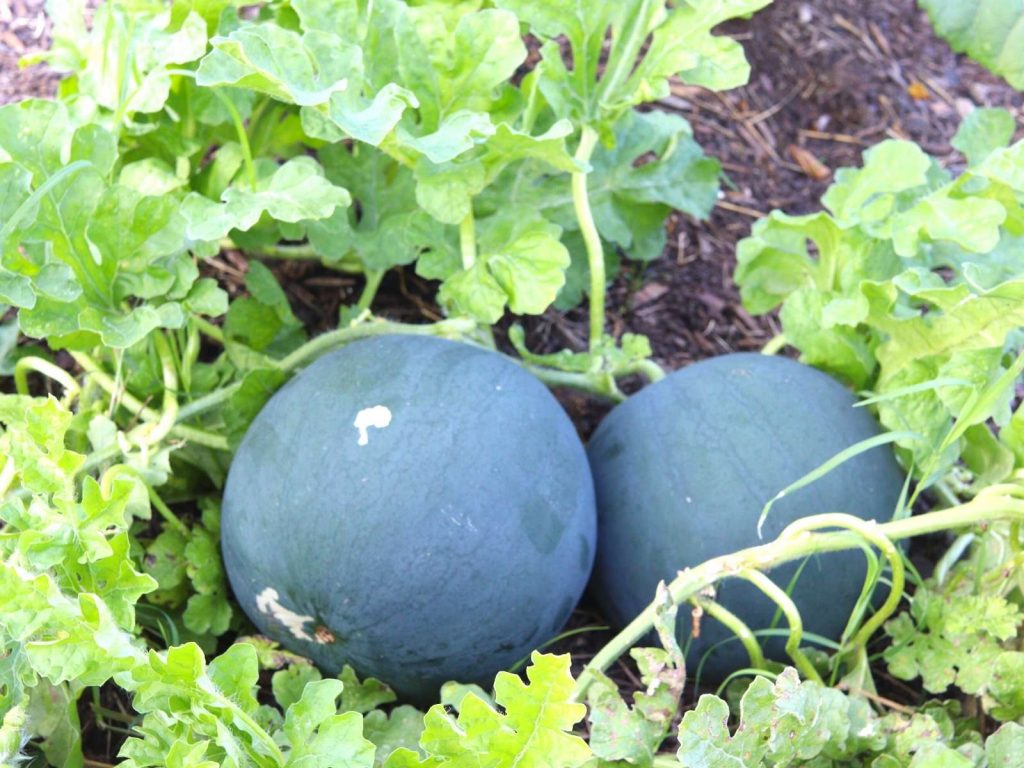
In fact, I’ve grown full blown pumpkin and watermelon vines in my raised beds! If you do something like this, it’s best to provide them a trellis to climb – or else they will take over your beds. Trellising your vegetables is a great way to get the most out of your planting space.
My absolute favorite things to grow in raised beds is potatoes and anything that vines. I love growing potatoes here because I know the soil is loose and drains well – a perfect environment for potatoes. The vining vegetables – beans, squash, etc. – are beautiful when I allow them to grow up trellises.
Benefits of Raised-Bed Gardening
For a beginner gardener, a smaller garden space is much easier to manage. Also, since you can place a weed barrier at the bottom of your raised bed, you should have fewer weeds to pull. This makes raised bed gardening attractive to new gardeners.
But even seasoned gardeners enjoy raised beds. Why is that?
One benefit is the height. Since the beds are elevated, this can reduce the amount of bending over you have to do when working in the beds.
Raised beds are also excellent for those with limited yard space to grow in. Using a method like square foot gardening, raised beds can give you the benefit of growing a lot of your own food in small spaces.
Raised beds also allow for you to have better control over your soil health. For someone like myself who has nothing but hard and heavy clay that is extremely hard to plant in, raised beds allow me to get started gardening now. I can work on amending my heavy clay soil over time while still having nice loose soil to plant in now.
A Note on Pressure Treated Wood in Raised Beds
There is a lot of discussion on if you should use pressure treated lumber when assembling your raised bed due. This is because in the past, pressure treated lumber was created using chromium copper arsenate which contained arsenic. However, in 2003 wood treated with CCA was discontinued for residential use because the chemicals from the wood could leach into the soil and affect plants.
There are some great articles out there, such as the ones linked below, that address the history of pressure treated lumber.
Can I Use Pressure-Treated Lumber for Raised Beds? (sfgate.com)
Raised bed lumber, pressure treated safe? | OSU Extension Service (oregonstate.edu)
Ultimately, I decided that I was okay with using the lumber we had on hand. I was aware of where it came from and the age of the lumber. If this isn’t the case for you, you should do your due diligence in deciding if pressure-treated lumber is a good option for your own raised beds. I would absolutely discourage you from using extremely old lumber or things like railroad ties.
Are you interested in in living a more self-reliant lifestyle?
Check out some of my other homesteading posts!
Ways to Homestead Without Land (Skills You Need Now!)