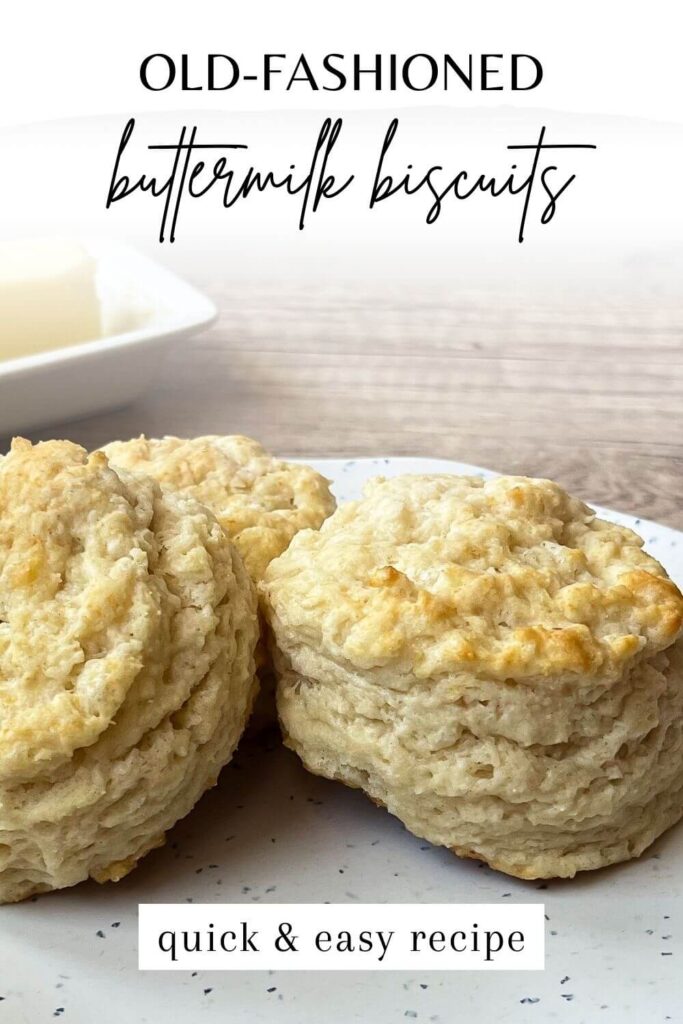
The Best Old Fashioned Buttermilk Biscuits
Making buttermilk biscuits from scratch doesn’t have to be difficult. This simple recipe comes together with just 6 basic ingredients, making them easy to whip up any time your craving buttery, homemade biscuits.
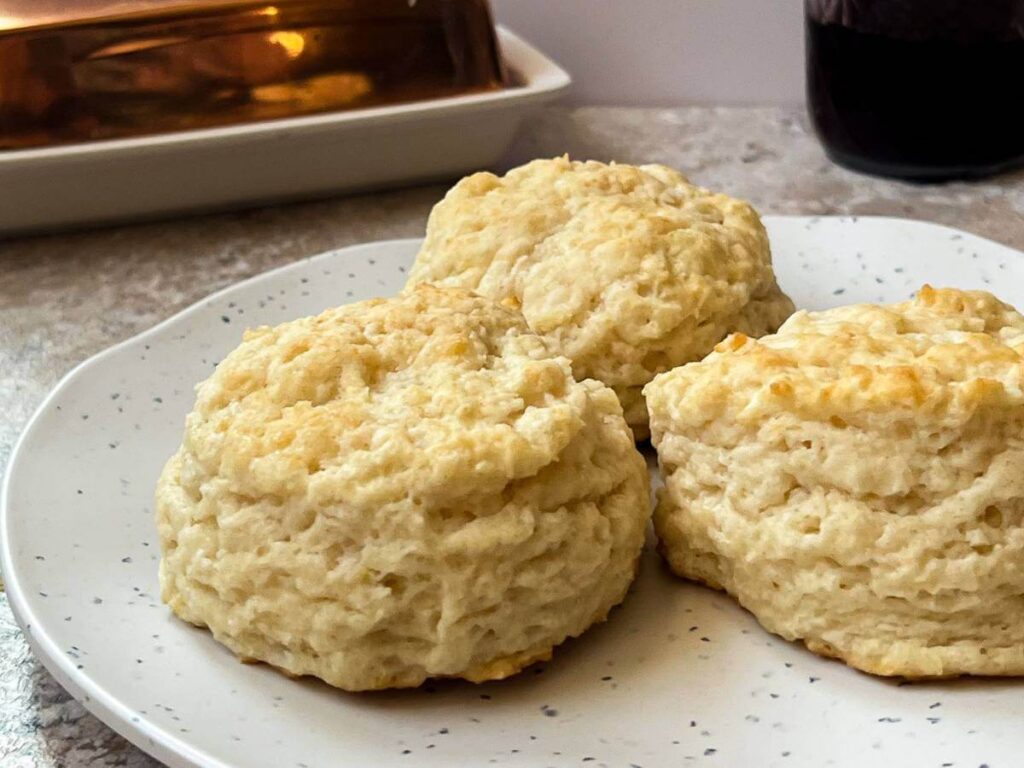
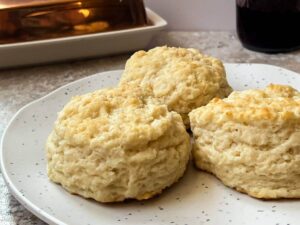
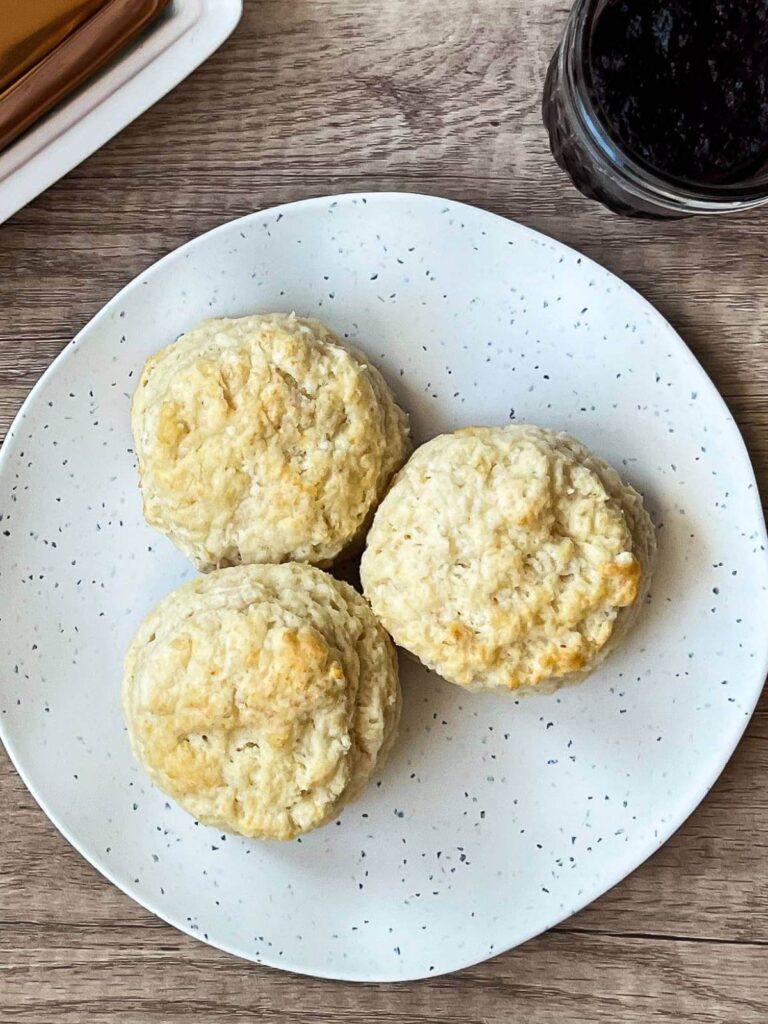
There’s nothing quite like a homemade buttermilk biscuit fresh out of the oven. Fluffy, buttery, and just the right amount of golden brown on top—these biscuits are pure comfort food.
This particular recipe was passed on to me by a family member, whose Mamaw has used it for years. It now shows up almost weekly in our breakfast rotation.
Whether you’re serving them up with sausage gravy, butter and honey, or making a breakfast sandwich, a good biscuit can take any meal to the next level.
And the best part? They’re not even hard to make! Just a few simple ingredients, a little know-how, and you’ll have yourself a batch of biscuits fresh from the oven.
Affiliate disclosure: This post may contain affiliate links. As an Amazon Associate this means I will earn a small commission if you choose to purchase through my links. This is at no extra cost to you! Read full disclosure here.
Why Make Biscuits from Scratch?
In today’s world of pre-packaged and store-bought options, you may wonder if making biscuits from scratch is worth the effort. The answer? Absolutely! Here’s why:
- Better Flavor & Texture: Homemade biscuits have a rich, buttery taste and a fluffy interior that’s hard to beat.
- No Preservatives: You know exactly what’s going into your biscuits—no unnecessary additives or preservatives.
- Customizable: From adding herbs and cheese to tweaking the level of sweetness, homemade biscuits allow for personalization.
- Satisfaction: There’s something deeply satisfying about pulling a tray of freshly baked biscuits from the oven and knowing you made them yourself.
Ingredients You’ll Need
This recipe keeps things simple with a short ingredients list, which makes it easy to memorize after you make it a few times. Here’s what you’ll need:
- All-purpose flour – I always use all-purpose flour for this recipe, but if you try whole-wheat or a gluten-free flour, let me know how it turns out!
- baking powder – Ensures the biscuits rise and have a light, fluffy texture.
- sugar – Granulated cane sugar is my go-to.
- salt – Balances the flavors and brings out the best in the biscuits.
- butter – Provides rich flavor and contributes to a tender, flaky texture. You can also grease the bottom of your skillet with it to get a beautiful golden-brown bottom.
- buttermilk – The acidity reacts with the baking powder for a good rise and adds a delightful tanginess.
Supplies You Need to Make Biscuits
Here’s the kitchen equipment I use to make homemade biscuits. Don’t have something I list? No worries! I’ll list some substitute items as well.
- Cast Iron Skillet – I absolutely love to bake biscuits in a cast-iron skillet – there’s just something so perfectly rustic about it. You can use also use a small baking pan if you don’t have a skillet though.
- Grater – You’ll need to grate your butter into the flour. A hand grater like this makes quick work of the job. You can also cut your butter into tiny pieces and use two forks to work it into the flour mixture.
- Biscuit Cutter – Don’t have a biscuit cutter? Use the ring of a mason jar or a small cup to cut your biscuits.
- Measuring cups and spoons
- Large mixing bowl
Step-by-Step Instructions
1. Preheat the Oven
Begin by preheating your oven to 400°F.
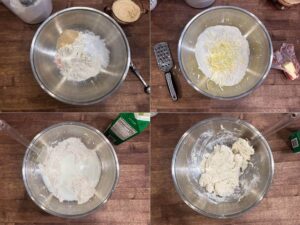
2. Prepare the Dry Ingredients
In a large mixing bowl, whisk together the flour, baking powder, sugar, and salt. Mixing these dry ingredients first ensures that everything is evenly distributed before adding the wet ingredients. You can use a fork or whisk for this.
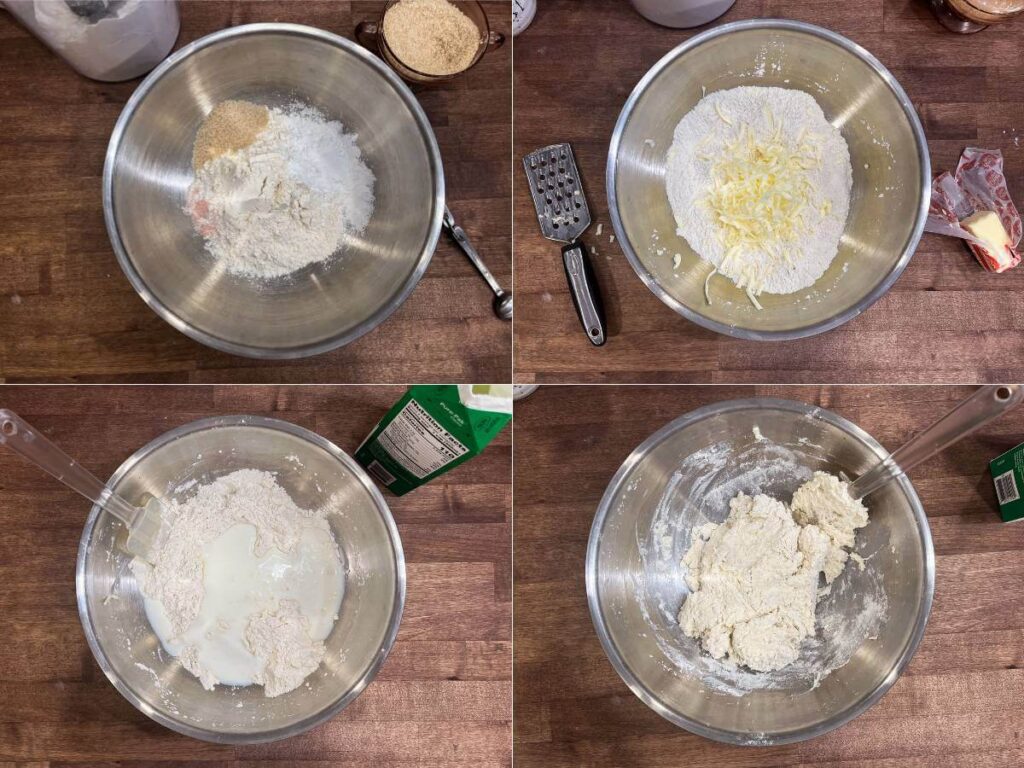
3. Incorporate the Butter
The secret to flaky biscuits is using cold butter. Shredding the butter directly into the flour mixture allows for even distribution and creates pockets of fat that result in soft biscuits.
Once shredded, use a fork to gently distribute the butter throughout. You can also use a biscuit cutter to cut the butter into the dry mixture if you choose.
4. Add the Buttermilk
Pour in about 2/3 of the buttermilk and stir gently with a spoon or spatula until just combined. Avoid overmixing, as this can lead to dense biscuits. The dough should be slightly sticky but manageable.
If it’s dry and crumbly, add a little more buttermilk.
5. Shape the Dough
Lightly flour a clean surface and turn the dough out onto it. Gently pat it into a 1-inch-thick rectangle.
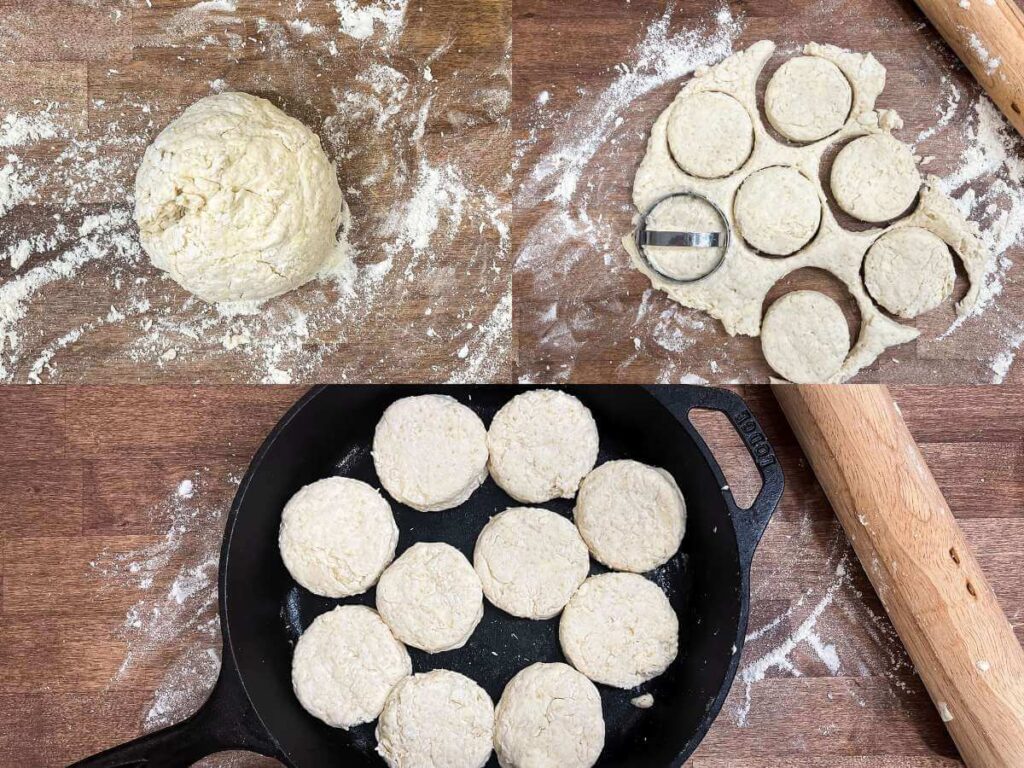
6. Cut Out the Biscuits
Using a biscuit cutter or the rim of a glass, cut out biscuits and place them on a parchment-lined baking sheet. For soft-sided biscuits, arrange them close together; for crispier edges, space them apart.
*I like to put a little extra butter in the bottom of the cast iron skillet. It adds another layer of crispy, buttery goodness to the bottom.*
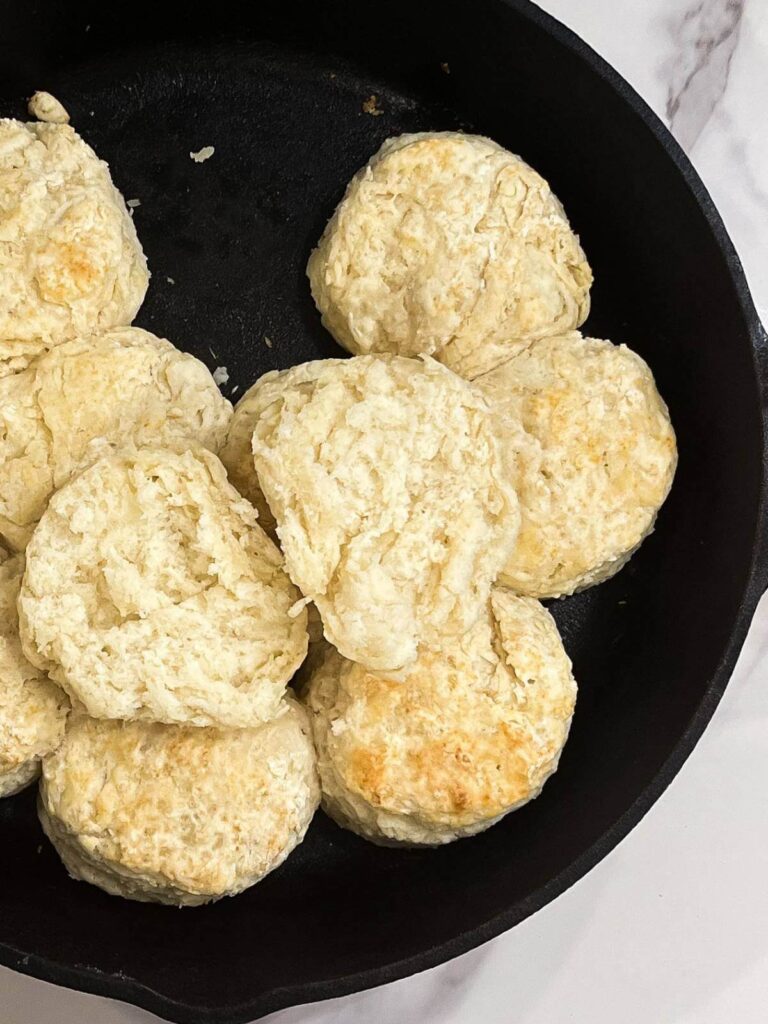
7. Bake
Bake in the preheated oven for 15-18 minutes, or until the tops are golden brown.
Buttermilk Biscuit FAQ’s
Tips for Perfect Biscuits Every Time
- Keep Ingredients Cold – Cold butter and buttermilk help create flaky layers. Make sure these ingredients come straight from the fridge.
- Use a Light Touch – Overworking the dough can make the biscuits tough. Handle it gently for the best results.
- Don’t Twist the Cutter – When cutting out biscuits, press straight down without twisting to ensure they rise evenly.
- Try Different Flavors – Add shredded cheese, fresh herbs, or even a sprinkle of cinnamon and sugar for a sweet variation.
How to Store & Reheat Biscuits
If you have leftovers (which isn’t always likely!), store them in an airtight container at room temperature for up to 2 days or in the refrigerator for up to a week. To reheat, simply warm them in a 350°F oven for 5-7 minutes or pop them in the microwave for about 20 seconds.
Can You Freeze Buttermilk Biscuits?
Yes! These biscuits freeze beautifully. Simply place unbaked biscuits on a baking sheet and freeze until solid, then transfer them to a zip-top bag. When ready to bake, place them on a baking sheet and bake as usual, adding a couple of extra minutes to the bake time.
What to Eat with Buttermilk Biscuits
These biscuits are incredibly versatile. Here are a few ways to enjoy them:
- Classic Butter & Honey – A simple yet delightful combination.
- Biscuits & Gravy – Smother them in sausage gravy for a Southern classic.
- Breakfast Sandwiches – Slice them in half and fill with eggs, cheese, and bacon.
- Jam or Jelly – A touch of fruit preserves makes for a delicious treat.
- Soup or Stew – Serve them as a side to soak up hearty broths.
Have you tried this recipe? Let us know in the comments how they turned out and any fun variations you added!
Old-Fashioned Buttermilk Biscuits

Equipment
- Hand grater or use forks to cut butter
- Cast Iron Skillet or baking pan
- Large Mixing Bowl
- measuring cups and spoons
- biscuit cutter can also use a cup or mason jar lid
Ingredients
- 2 cups all purpose flour
- 2 tbsp baking powder
- 1-2 tbsp granulated sugar
- 1 tsp salt
- 1/4 cup cold butter 1/2 stick
- 1 cup buttermilk
Instructions
- Begin by preheating your oven to 400°F.
- In a large mixing bowl, whisk together the flour, baking powder, sugar, and salt.

- Shred (or cut) the cold butter directly into the dry mix. Once shredded, use a fork to gently distribute the butter throughout.
- Pour in about 2/3 of the buttermilk and stir gently with a spoon or spatula until just combined. The dough should be slightly sticky but manageable. If it's dry and crumbly, add the rest of the buttermilk.
- Lightly flour a clean surface and turn the dough out onto it. Gently pat (or roll if preferred) it into a 1-inch-thick rectangle.
- Using a biscuit cutter or the rim of a glass, cut out biscuits and place them in a cast iron skillet or on a baking sheet. For soft-sided biscuits, arrange them close together; for crispier edges, space them apart.
- Bake in the preheated oven for 15-18 minutes, or until the tops are golden brown.