Supplies to Raise Your Own Quail – Beginners Guide
Thinking about raising your own quail, but have no idea what you need? This list will lay out what supplies you need to take your quail from hatching to processing.

When someone is new to homesteading, raising chickens is the first animal that usually comes to mind. And while I do love our chickens, I have discovered that raising quail is actually a little easier and pays off a little faster.
There are tons and tons of items on the market – but what do you actually need? This is a compiled list of the supplies we use to raise quail in our backyard for meat and egg production.
Chickens vs. Quail – Time to Produce
With dual-purpose chickens, you will typically start to see eggs somewhere between 16-24 weeks of age. Quail, however, usually start somewhere around 8 weeks old.
You are also able to process quail for meat purpose around the 8-week mark. A dual-purpose bird will be twice that time before it is ready to process, if not a little longer.
Here’s a look at the supplies you will want to have. I have linked specific products that we use down below. Additional details on when each item is needed are found throughout the post.
(Affiliate Links – This post contains affiliate links. As an Amazon Associates, this means I will earn a small commission, at no extra cost to you, if you purchase through my link.)
List of Supplies for Quail
- Incubator with Quail Rails
- Brooder Box with Heat Source
- Feeders – Brooder Feeder and Cage Feeder
- Quail Sized Waterer
- Water Cups for DIY Watering System
- Egg Trays
- Egg Scissors
- Cage System or Tractor
- Heavy Duty Dispatch Scissors
You’ll also need to select feed type and bedding for the brooder.
We feed a “game bird starter” crumble from a local feed store for the birds we are raising for meat purposes only. This is a high protein feed. Birds that are raised to be breeders/egg layers are fed a “game bird layer” feed.
Best Beginner Friendly Incubator for Quail
We use the Farm Innovators Model 4250 incubator for hatching all of our quail. This incubator is small and budget friendly. The instruction manual is straight-forward and makes it easy for newbies to use. It has a built-in fan for air circulation as well as an automatic egg turner (super important unless you want to be turning eggs daily). We average a 70% hatch rate with this incubator. You will need to purchase the rails specifically for quail eggs since the incubator comes with rails for chicken eggs.
Purchase Here:
Brooder Box with Heat Source
We have found this DIY brooder box to be the best option for raising our quail. Since we are not raising these birds for commercial purposes, it did not make sense financially for us to spend hundreds of dollars on the brooders. At least not when we are able to recreate a safe environment for much less.
Whatever you chose, you’ll want to make sure it is deep enough or has a cover so the birds cannot fly out. These little bids will begin fluttering around within the 1st week!
You’ll need to make sure you have good ventilation, a reliable heat source, and plenty of room for the birds to stay warm without piling on top of each other. You also want all sides to be closed in so that there is not a draft, and you are better able to maintain the temperature.
This is the cover we built to go with our boxes.

You’ll also need to select a heat source for your brooder. Options include heat trays and heat lamps. We opt for the heat lamp, although heat trays are becoming more popular.
Leaving a heat source on continually can be dangerous. So whichever option you chose, you will want to closely follow all safety recommendations that come with that product.
Purchase Here:
Feeder
When your quail are freshly hatched, you may find a regular feeder to be too large for them.
We start by placing the finely ground feed on a paper towel for the first week or so, and then transition to a small feeder, such as this one. We continue to use a couple of these small feeders in our smaller tractor.
If the quail are moved to the cage system, we have different, larger feeders set up that reduce waste. Quail are MESSY eaters and will throw food everywhere. We use these boxes with added wire in our stacking cages.
We have also built a DIY feeder that we use in one of our two tractors. All of the feeder’s work find and do their job, but I do think I prefer the DIY feeder the most. It holds the most food and reduces waste the most.
Buy Here:
Waterers
In the brooder, you are going to want to purchase a watering tray made specifically for quail. We have tried using the regular chicken watering trays, but they are too large, and the tiny quail can actually drown in them. So, we opt for these waterers with the small rims.
Once out of the brooder, we transition over to our DIY automatic waterers using these watering cups. These cups do occasionally have to be replaced from breaking and they will fade over time. But the bulk price isn’t bad, and they keep the water clean.

Buy Here:
Egg Supplies
Once your quail start to lay eggs, there are a couple of items that I have found to be so helpful!
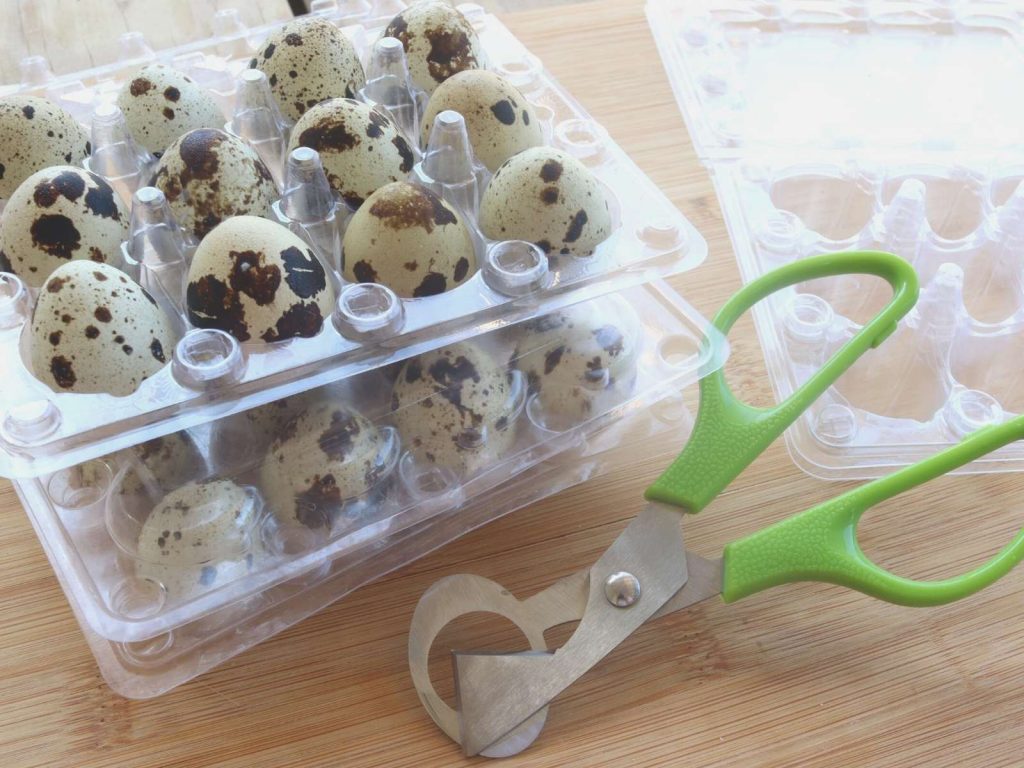
These scissors are a game changer when it comes to cracking these tiny eggs. When cracking by hand, it is hard to keep from cracking the entire egg to pieces due to the size. This means you can easily end up with tiny pieces of eggshell floating around. These scissors make it a breeze to open several dozen eggs within minutes and drastically reduce the eggshell problem!
If you are going to get quail – you need these scissors!

Also, you’ll want somewhere to store the eggs. We collect a couple dozen eggs daily. Chicken eggs are already stacked up on my counter, so I opt for using cartons like these to store in the fridge. These cartons also come in handy when you are collecting eggs that you want to incubate for your next batch of eggs (don’t put those in the fridge!), or when you are selling your extra eggs.
Buy Here:
Cage System or Tractor
You’ll also need a housing system set up for once the quail come out of the brooder box. There are options like aviaries, tractors or cage systems.
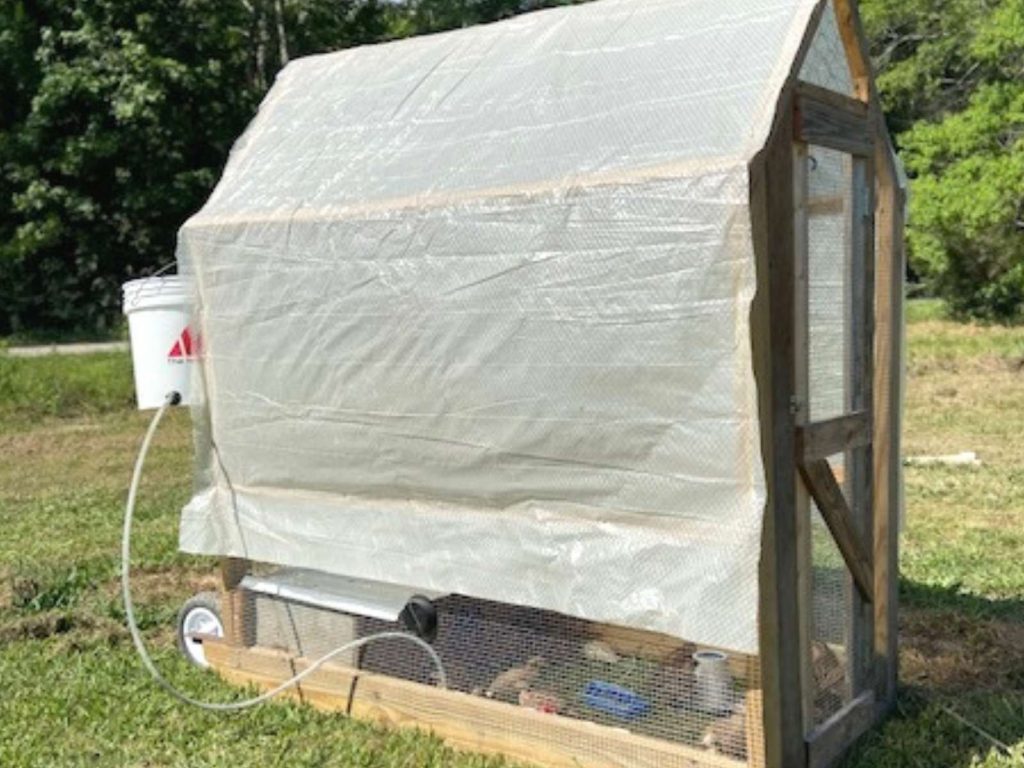
We use a combination of cage systems plus tractors. The cage system is a stacking system that we use for our layers and breeders. The tractor is what we use to raise our birds in that we will be processing for meat.

You can buy prefabricated cages from somewhere like QuailCage.com, or build your own.
Dispatch Scissors
When the time comes for processing, the most important thing to have is a good pair of dispatch scissors to make the process go smoothly.
We’ve found this stainless-steel pair to be great. You can take the blades apart to do a thorough cleaning after each use.

Buy Here:
Read more on Backyard Poultry:
How Much Does It Cost to Raise Chickens for Meat
Easy Spicy Pickled Quail Egg Recipe
Lavender Orpington Chicken Guide
Pin It for Later!

