
What You Need to Process Chickens at Home (Supplies Checklist)
If you’ve decided to raise your own meat chickens, you’re probably thinking ahead to what you need in order to butcher and store them. This list will ensure you have everything you need for your next backyard chicken processing day.

We’ve raised various meat chicken breeds on our little homestead. From hybrid chickens, like the Cornish Cross Broilers and Red Rangers, to heritage breeds, like our Delawares that we’ve decided to stick with.
But one thing is the same across all breeds – chicken butchering day.
And having the right supplies on hand can make this day go so much smoother. Especially when processing large batches of chickens.
First, let’s take a look at the absolute must have items you need to process your own poultry.
And then we will move into some poultry products that will make your life so much easier if you are able to invest in them.
Just remember, regardless of if you have expensive equipment or not, you can still provide your family with a high quality food source – right from your own backyard!
Be sure to print or screenshot the checklist you’ll find at the bottom of the post!
Necessary Supplies to Process Chickens at Home
- Large Pot, Burner, and Thermometer
- Buckets, Trash Bags
- Dispatch Tool – Sharp Knife, Large Shears, or Hatchet
- Sharp Knives and Sharpener
- Clean Work Surface
- Water Source
- Cooler with Ice
- Storage Bags
Supplies to Make Processing Chickens at Home Easier
- Heat Resistant Gloves
- Stainless Steel Kill Cones
- Plucker
- Pinning Knives
- Lung Scraper
Let’s talk about these items in a little more detail now.
Curious about how much it cost to actually raise meat chickens? Check out my records on cost to raise 30 cornish cross meat chickens!
Dispatching Chickens Supplies
The first step in processing your chickens is the dispatch step.
There are a few different techniques for dispatching a chicken. We choose to use the beheading method, which is exactly what it sounds like.
By using a very sharp tool, such as a knife or large shears, the chicken’s head is removed from the body. Believe it or not, this is one of the quickest and humane ways to dispatch your chickens if done correctly.
It is incredibly important to make sure that your tools stay sharp throughout the process. So be sure to keep a sharpener nearby.
We also use a killing cone during this step. We have processed birds without these cones, but there is no doubt that the cones make things easier.
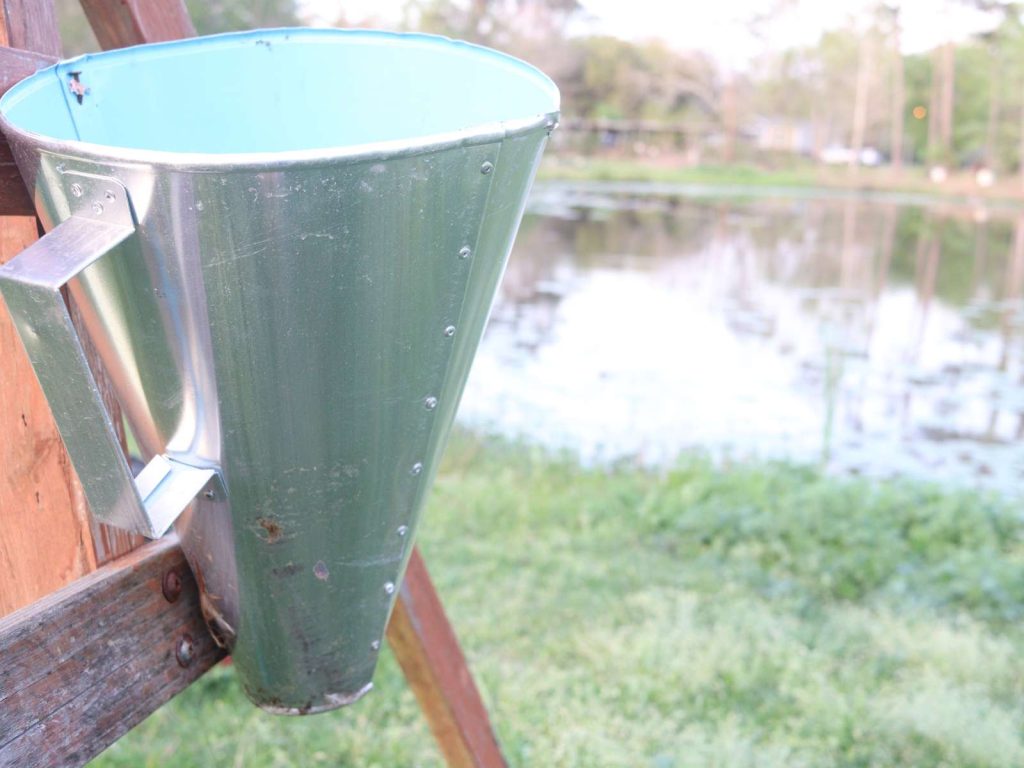
Our cones were made locally, but you can also grab one like this off of Amazon.
The chicken is placed in, upside down, and it’s head comes through the hole in the bottom. This holds the chicken in to place during the dispatch process.
This not only makes sure that you get a clean cut during the dispatch but it also reduces the amount of blood splatter.
Be sure to place a bucket under the kill cone to allow the blood to drain.
Feather Removal Supplies
Next you are going to need to remove the feathers from your bird.
You have a few different ways to do this, but you’ll want to start with scalding the bird.
Scalding
To scald your chicken, you are going to need a large stockpot filled with clean water and a burner.
You will need to maintain the water temperature in the range of 130-170 degrees Fahrenheit during the entire scalding process. Too cold, the feathers won’t come out. Too hot, you’ll start to cook the chicken.
Your pot should be large enough that when you dunk the chicken, the entire feathered part of the bird is covered with water, yet it does not overflow.
Once your water is in the correct temperature range, grab your chicken from the kill cone. Holding it by the feet, you’ll submerge the full body in the hot water, swirling it around for about 10 seconds.
Heat resistent gloves are helpful during this process to reduce the chances of the scalding water getting on your hands.
We also love raising Coturnix Quail on our homestead for meat and eggs. Learn all about how to get started raising your own backyard quail!
Remove the feathers
One option is to hand pluck the birds. The scalding process makes the feather removal process much easier. If you are only processing chickens on small scale – 1-3 at a time- it won’t be too bad to do this way.
However, if you are trying to stock the freezer with chicken, you are probably going to want to use a chicken drum plucker.
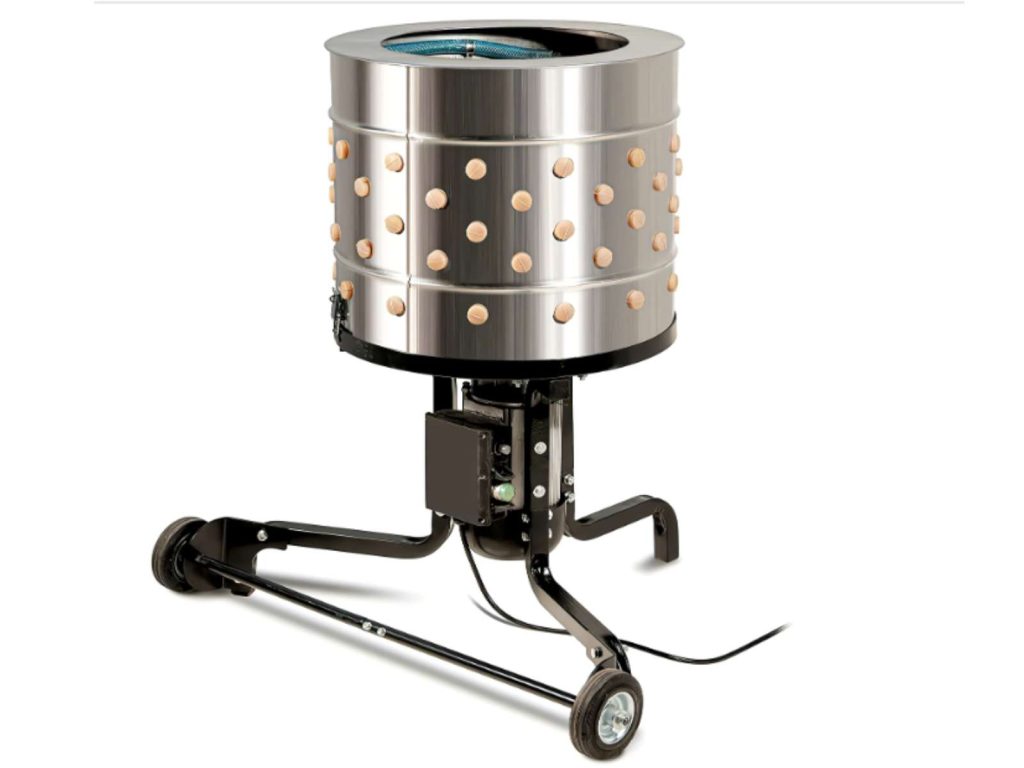
When you’re ready to buy, I recommend this Yardbird Chicken Plucker We’ve been borrowing a family members, and it works wonderfully!
You simply place the chicken in the plucker turn on your water supply, turn it on for a few seconds, and your bird comes out almost featherless.
Honestly, purchasing a chicken plucker made the hardest part of processing the easiest. It saves a great deal of time, reducing our poultry processing day by hours.
So, if you’re planning to process a lot of birds at once, I highly recommend investing in a plucker once you’re able.
After the majority of the feathers are removed, you can use a pinning knife. This is to remove any of the little wispy feathers that are left over.
Another method that can be use here is to skin the bird. Our first-time processing birds, we used this method since we didn’t have a plucker.
Supplies for Cleaning the Chicken
Now you have a bald chicken – and you have to clean out the body cavity.
Make sure you have a clean work area to work on, and cool running water to rinse the birds as needed. Ideally, you will be processing when the weather is cooler out. If outside, try to pick a shady spot to keep the sun off of the chickens.

You’ll also want to have a sharp knife handy, something to put the unwanted parts in, and a cooler with ice ready to put your cleaned birds in.
After using the sharp knife to separate the esophagus and trachea and remove the crop from the neck cavity, you’ll then use it to cut a slit in the backside of the bird. This is where you’ll be accessing the bird from to remove the rest of the organs.
This is pretty easily done by hand, although one helpful tool is a lung scraper. The lungs stick to the sides of the cavity and can sometimes be difficult to scrape out.
This is definitely an optional tool – but again – it can be helpful when processing your own birds.
You’ll want to wash your bird with cold water well before placing them in the cooler.
Chicken Storage Supplies
Now you’ve got a bunch of full dressed birds and you’re ready to get them in the freezer!
We’ve done our own chickens a couple different ways.
One is to freeze the whole chickens in these poultry shrink bags. The shrink bags remove all air from the bag, reducing the size of the whole bird. This is nice when you are needing to store a years worth of chicken in your freezer!
To use the shrink bags, you place the whole chicken in the bag. Then, you insert a small hard tube into the body cavity, and ziptie the bag closed around the straw. You’ll then dunk the bag in hot water, which causes the bag to shrink and all air to be removed. The tube is then removed, the zip tie pulled tight, and you’re chicken is done!

Another is to piece the chickens out. A vacuum sealer can then be used to create bags of breast meat, leg meat, etc. The removal of air from the bags reduces the chances of freezer burn.
You could also use freezer safe plastic bags here, although they aren’t quite as effective at preventing freezer burn during long term storage.
Canning your chicken meat is also an option, but you’re probably not going to want to do this on the same day you processed the birds.
That’s it! Now you should be ready for your own processing day.